Quantcast
Channel: Sew Busy Lizzy
Viewing all 176 articles
Browse latest View live

The Unblogged – Grainline Willow Tank and True Bias Ogden Cami

$
0
0

As 2016 rapidly disappears, I’m determined to clear some of my projects out of my head and into the blog. So expect a slight rush of posts before I disappear again for a while.

I view my blog as a documentation of my makes and my sewing journey – I’ve frequently been sorry I haven’t blogged a few things as when I go back to a pattern I have no notes of the changes or size I may have made.

So for record-keeping sake for me (selfish blogging)… here are the Grainline Studio Willow Tank/Dress and the True Bias Ogden Cami.

No time for photos and I don’t think they really merit the time required, particularly since the Willow feels like a work-in-progress.

Most of my blog photos are taken while walking my dogs on the beach, however I simply haven’t had the time to be so organised to be achieving multiple things at once this year. And sometimes… I just don’t want a photo of ‘tired me’ on record.

True Bias Ogden Cami

I really don’t feel the need to write an epic blog post about the Ogden Cami as it has been blogged everywhere – and generally received a tsunami of universe love. With good reason. It’s simplicity can make it a very versatile winner if it’s your sort of thing and the dartless fit works for you. It must be said, I’ve seen several add darts to this pattern with great success.

Odgen Cami by True Bias.

Ogden Cami. Hot off the machine.

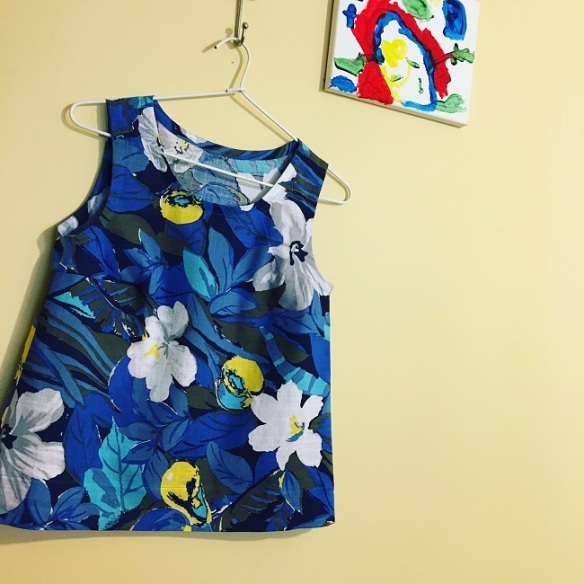
I’ve sewn this up with some leftovers from this skirt.

I made this ages ago and tried it on before I understitched the facings… the fit seemed a little too tight under my arms and across my upper bust. I assigned it to the naughty basket, upset to have wasted about $1 worth of leftover ‘op shop’ vintage fabric that I loved but felt unable to throw it out. Ridiculous but true.

I rescued it this week, understitched the facings and then pressed and pressed it… and for some reason… perhaps different underwear choice (!), the fit is much better and I now adore it. Another pretty little top to wear in summer with my favourite scruffy jeans. Lesson learnt: don’t give up too early!

Odgen Cami by True Bias

Ogden Cami ‘out in the wild’ sneak retail store mirror shot while Christmas shopping

I opted to just overlock/serge the lining lower raw edge and use a narrow hem on the outer hemline.

Described on the True Bias site as “The Ogden Cami is a simple blouse that can either be worn on its own or as a layering piece under blazers and cardigans. It has a soft V neck at both center front and center back necklines, and delicate spaghetti straps. The neckline and armholes are finished with a partial lining for a beautiful, high-end finish.”

And the suggested fabrics are “Light weight woven fabrics such as crepe, rayon challis, voile, and lightweight linen.”

Like so many before me, I do really like this pattern. I do struggle to tell the front from the back – which based on responses to my instagram post is a common theme and it’s agood idea to mark the back with the label or some stitches. I’m sure I have it on backwards in the above photo… no one noticed… so wear it however you fancy I say!

Pattern: Ogden Cami, by True Bias
Size: 0
Fabric: Vintage cotton I purchased for $3 from the op shop. It was only about 1m wide. I’m not sure whether it has a bit of rayon in it, or perhaps all rayon and maybe some polyester. Whatever it is, it’s cool to wear with nice drape and oh so pretty.

Grainline Willow Tank/Dress

I purchased this on impulse when I succumbed to the Penny Raglan. And also thought at the time… “Did I just pay that for a basic woven top pattern?”. However for me, Grainline is a good buy. Solid, reliable basics that are always in high rotation for everyday wear. Not necessarily ‘exciting’ sewing but highly wearable pieces that always seem to come together with little effort or fiddling.

The Grainline Willow Tank is described as “…fitted at the shoulders and falls into a relaxed fit below the bust. It’s unfussy and can be made into a dress or a tank top…  Techniques involved include sewing a straight seam, darts, hemming and applying bias facing. Pattern is nested to facilitate cutting between sizes if needed.

Suggested fabrics are: “Light to medium weight fabrics such as cotton, linen, silk, crepe de chine, charmeuse, voile, chambray, etc.”

Both my attempts at the Willow Tank have been made in leftover pieces of linen.

Willow Tank, pattern by Grainline Studio.

Willow Tank, pattern by Grainline Studio. My first attempt in a rayon/linen blend from Lincraft

I made my first Willow back in July!

The darts on my first Willow are at least 1/2inch, if not more, too low. Despite this, I do prefer the fit of this one compared the second Willow (below) as this linen is a linen/rayon blend and the fabric drapes in a slightly softer fashion. So much more forgiving of the low darts. Despite the slightly-off fit, I’ve worn it several times as it’s so darn pretty and a perfect partner to scruffy jeans on the weekend. It’s leftover from my Grainline Morris Blazer which I adore and love to wear.

Willow Tank, pattern by Grainline Studio

Willow Tank, take 2. Floral lightweight linen from The Fabric Store

The second I whipped up in a lightweight linen, leftovers from a Vogue dress I finished up tonight after dinner with some hand stitching. I shifted the darts up 1/2inch however I think they need to be higher. I simply folded up the excessive between the dart and armhole so as not to impact on the armhole size and did likewise on the back piece.

As this linen has less drape, despite being a finer fabric than my first Willow, it’s far more tentlike on me. My eldest daughter loves it, mainly because the fabric is so pretty I think. So perhaps I’m being too fussy… it’s been known to happen! Maybe paired with some skinny jeans or shorts I will feel differently.

Willow Bias Finishes

I used to hate bias finished neckline and armholes, however I am very pleased with the finish on these. They are lying beautifully flat and neat.

I did sew the bias stripes end to end with a 20mm seam, rather than the 4mm (1/4 inch) seam as directed. I found them a little long and I like to stretch them a little to fit as I find they sit flatter when finished – in my experience anyway. This does really depend on your fabric choice and the stretch of the bias though!

You do need patience to achieve a nice neat finish with bias strip finishes – and it’s worth it. I find it easier to press the edge of the bias stripe that will be turned to the inside before I attach the other edge to the neck or armhole. I find it’s easier to achieve a more consistent width of the bias tape –and avoids iron-steamed finger tips!

I whipped this one up on a Sunday morning.

Pattern: Grainline Studio, Willow Tank Dress
Size: 0
Fabrics: rayon/linen blend from Lincraft (blue/white) and lightweight linen from The Fabric Store (blue/khaki/white/yellow).

Final Thoughts

I love having these patterns that use minimal fabric lengths. I think there are a few more people out there with an ever-growing stash of fabric scraps that seem too big to throw out yet too little for another project.

I’m trying to make these little tops and whatnot with the ‘leftovers’ as I’m sewing other dresses or skirts to ensure I don’t end up with piles of short lengths that never get used for anything. It’s too easy to move onto the next project rather than tying up the ‘loose ends’ of the leftover pieces. Not to mention the fact if you whip up a little top in the same fabric you don’t need to change your machine threads!

I think they are also excellent for those irresistible remanent bin purchases and indulging in some gloriously expensive fabric as you don’t need much.

Not everything we sew needs to be a dress.


The Unblogged: Waffle Pattern Vanilla and Cali Faye Collections Rumi Top

$
0
0

So yet more tops, this time some knits.

While I was feeling out-of-sorts this year, I resorted to sewing lots of simple tops to sate my craving to sew – which it really didn’t. Although I do have a collection of tops to wear so all is not lost. In hindsight I should have sewn more complicated garments, I find while I love simple garments, I find sewing challenging garments more relaxing – which is what I needed in 2016. However these little garments were about all I could fit in. Such is life!

Vanilla Top, Waffle Patterns

First up the Waffle Pattern Vanilla top.

I hate these photos so probably why it’s been hovering in the Neverland of Unblogged.

Vanilla Top, Waffle Patterns

Vanilla Top, Waffle Patterns

One thing I really don’t like about this top is how the perfectly neat neckline hits the stripes at an odd angle (due to the slightly-off-beat stripe directions with the drape) and looks messy. It really annoys my eyeballs like dust on a dry windy afternoon! I’ve often worn a scarf with it for that reason because it visually drives me bonkers. But I can be precious.


I do find the sleeves an odd length but I also think in a different weight fabric they wouldn’t bother me so much.

Waffle Patterns, Vanilla Top

If you like stripes doing odd things, you will love this

So another easy-to-wear-with-jeans garment as hence got a lot of wear throughout the colder months as a ‘house’ jumper with jeans.

Yes, you may recognise the fabric from my first Penny Raglan. I managed to squeeze a Penny Raglan and this top out of 2m of this fabric.

I think this fabric choice is too heavy for this design BUT very easy to make and rather fun to wear. My eldest daughter has declared that this will be her top when I tired of it.

This is the second Waffle Patterns pattern I have made and I must say I do enjoy them. Nicely presented, comprehensive but not excessive instructions well illustrated with diagrams, and an A0 copy shop sheet printing option… and you can turn off layers to print as many or as few sizes as you like. I’d love to try some of her jacket patterns, the details are thoughtful and they have intrigued me for some time.

Pattern: Waffle Patterns, Vanilla top
Size: Size 34
Fabric: Make It Fabrics, Brisbane

RUMI TOP by Cali Faye Collections

Next up a Cali Faye Collection Rumi Top which was released a few months ago.

I volunteered to pattern test for this and found the process really interesting. I’ve always quite liked the design aesthetic of this designer, simple and modern. Although the pattern price point is quite high.

Rumi Top, Cali Faye Designs

Rumi Top, Cali Faye Designs

Cali Faye Collections have a closed facebook group for their testers. Throughout testing period, testers post their versions, comment about the design, instructions and so on. The pattern did changed several times in response to feedback from testers and it was interesting seeing different fabrics being used. I thought it was a thorough, open and interesting community sewing process.

Rumi Top - Side view

Rumi Top – Side view

I sewed up the final version which you can see here. It’s a large over-sized boxy top with fitted sleeves. I’ve worn it a lot, it is easy to wear and great with skinny jeans or fitted pants. It is a very simple design and reminds me of my Japanese pattern book top patterns.

The neckline is finished with woven bias tape. I haven’t finished a knit neckline in this manner before and would be curious how that works for a stretchier knit than this. With this rather stable cotton terry knit, it did provide a nice neat, flat finish.

I would advise sewing with a knit with nice drape. Anything too heavy and you may find yourself wearing a tent!

Rumi Top, Cali Faye Designs. Back view

Rumi Top, Cali Faye Designs. Back view

Pattern: Cali Faye Collections Rumi Top
Size: XS
Fabric: Cotton Terry Knit, Spotlight Australia
Note: I received this pattern as part of the testing process, all opinions my own.

And I think that’s all the Unblogged tops done now. Hooray!


A dress: Vintage Vogue 8974…

$
0
0

Or when everything old is new again… (and a recent make!)

A floral vintage Vogue Patterns 8974

A floral vintage Vogue Patterns 8974

I’m not really a vintage gal. It doesn’t seem to fit with my casual aesthetic and I think it would be a little odd in my workwear wardrobe which tends to be quite modern and fitted.

However that doesn’t mean that I don’t appreciate it on others or have the odd craving for a bit of old-fashioned pretty. And not every interpretation of a vintage pattern needs to be ‘vintage’. Perhaps that is why I have been drawn to a couple of the Vintage Vogue re-issue patterns of late.

I’ve been looking for a dress pattern for three metres of gorgeous black bamboo linen I got at East Coast Fabric with Jen and Lizzie when I was in Brisbane in October.

I’m after a longline, sleek summer dress but with a striking design detail to relieve the severity of a lot of black fabric.

Amid my searching I came across Vogue 8974, a design from 1949. This hasn’t been made much (in Blogland at any rate), I suspect the need for a strapless bra and the a-line skirt (rather than a generous gathered or pleated skirt of the 1950s era) has let it loll in the back of the catalogue, waiting to be discovered.

Vogue 8974 pattern art - courtesy of Vogue Patterns

Vogue 8974 pattern art – courtesy of Vogue Patterns

I really love the jacket as well. I’m not really a matchy-matchy girl so I’ve just made the dress. I think the jacket would be a very cute project in the future!

CONSTRUCTION

It’s a relatively simple make. The pattern construction has a very cool snap closure at the side waist. While I loved the idea of this, I decided to replace it with a zip. I find dresses with side closures that don’t release all the way to the armhole incredibly difficult to pull off over my shoulders. I almost dislocate my shoulders getting them off. I don’t know if my shoulders are weirdly larger in comparison to my rib cage or it’s simply that I’m not the world’s greatest contortionist. Either way, I don’t enjoy clothes that require a can opener to get in and out of.

Vintage Vogue 8974

Vogue 8974 line art, courtesy of Vogue Patterns

I added a lining to the bodice as the linen is slightly sheer on the white areas of the print. I didn’t worry about lining the skirt as it hangs away from my body and I wanted to keep it light and airy as linen is so cool to wear in summer.

I think I could shorten the bust darts a little.

The front bodice neckline is a little fiddly to sew but pinning and patience gets you through. I often add a little length to a bodice, however I left this one as drafted and it seems to be the right length on me.

The bodice has lovely french darts and a marvelous neckline.

The pattern doesn’t direct you to interface the facing pieces for the bodice, which I thought was odd so I added this.

I omitted the buttons as I don’t think this fabric needs embellishment.

FIT

It’s a tricky one. I made the size 6. People talk about the Big 4 having too much ease etc etc. I’ve often seen people make certain sizes based on this theory and then have a disaster make.

Refer to the body measurements on the envelope by all means. I ALWAYS chose my size and grade between sizes based on the FINISHED measurements on the pattern paper. It’s always interesting to compare the envelope body measurements to the finished measurements and see how much ease they are allowing. I would recommend chosing your size based on the ease that you prefer. This may be more or less depending on the style of garment.

Vogue 8974 - side view

Vogue 8974 – side view

I sewed this up and was pretty happy with everything EXCEPT the bodice upper edge sat away from my body from my mid upper bust and around under my armpits. While it looked OK and my family couldn’t see what I thought was so odd… I felt like ‘bewbs in an icecream sundae glass’. That’s the best description I can come up with🙂 You can still see some of this gaping at the side (see below) and I’m not 100% pleased with the fit above my bust either. Perhaps a firmer fabric would be less likely to crease above my bust. So maybe the bamboo linen is not destined to be a Vogue 8974. We will see.

Vintage Vogue 8974

Vintage Vogue 8974

As the front slopes down to the back, it isn’t just a matter of running in the sides to pull it in and make it fit (no I don’t muslin much… I like to think of myself as an eternal optimist and sew with that attitude). As I was mid-make, taking it in at the sides was my only option and I pulled more in from the back on an angle to make it work. This in turn messed up my lovely neat-as-a-pin facings which was a little disappointing. Yes, very dodgy but only you, me and few other thousand readers know this – and I don’t wear my dresses inside out. So my secret is safe🙂

I had to take at least 2 inches off the straps. For some reason you attach the straps to the back bodice and then adjust them at the front. The front bodice is quite fiddly and I think it would be simpler to adjust the straps at the back instead if I make this again.

A pretty cross-over back strap detail.

A pretty cross-over back strap detail. The rarely seen tatto- you’re welcome.

I took 3 inches off the length (I am 5 foot 4) and turned the hem up with some blue bias tape from the stash. I hand stitched the hem, I love the finish of a handsewn hem.

FINAL THOUGHTS

Love this design. It feels modern and feminine without being fussy. I’m extremely tempted to make it again… I just need to figure out how to best deal with the gaping at the upper bodice and underarms. Or maybe it’s meant for someone with more curves than me!

It reminds me a lot of the Sewaholic Lonsdale which perhaps I should also revisit.

If you have any suggestions on fitting or another dress pattern I should try along these lines… I’d love to hear it!

Pattern: Vogue 8974
Fabric: Linen from The Fabric Store, Brisbane (purchased a couple of years ago). Blue, khaki, white and splogdes of yellow, I adore this colour combination.
Also see: See Carmen Sew | The Fold Line | Silver Cat Tea Party


Photobombed by a pelican

Photobombed by a pelican in my lunchbreak.

It’s quite odd posting my projects out of order. Seeing my hair change lengths and colours. It’s much healthier now than a year or so ago.

This time last year, I cut off my nails as they kept snapping and my hair was thinning and breaking for no apparent reason… actually I think it was mainly two things… too much stress, exhaustion and no rest…  It was the day I put my hair up in the ponytail and a large amount of it simply snapped off around the hairband, I realised something had to give… I changed some things and I feel much better a year on. So all’s well that ends well.


Happy New Year & a ‘new’ room

$
0
0

Hello & happy new year!

I’m still working my way through the backlog of 2016 posts but in the meantime I thought I’d quickly post what I’ve been up to…

Tidying up my sewing room!

I felt suffocated by commitments and responsibilities in 2016. I took on too much in 2016. I said ‘yes’ too many times when I should have said ‘no’. I felt obligated to help others, going out of my way to make time for people, even those who didn’t deserve or appreciate it – much less understand the pressure it caused. 2017 will be different.

While I’m figuring out how to get through 2017, I decided that I would tackle my ‘life junk’.

I started with my sewing room.

I’m not a ‘super mum’ and I loathe the term. I doubt there are any. I’m just another person trying to juggle too much, too often. It’s impossible to do everything all the time – although I do like to kid myself I can. Sometimes you manage to pull it all together… those are the good days…. sometimes you cry, you panic on route to the next kid pick-up, you lose your temper, your patience and everything else along the way… but life goes on regardless. That’s just life really.

I love to sew. It clears my head. However as 2016 proceeded to spin out of control and then run me over like a freight train, my time to sew dwindled dramatically and so did my time to tidy/clean etc – not just my sewing room but anything. Life became increasingly chaotic. Then it became difficult to sew because I felt overwhelmed by the ‘mess’ in my sewing room. And everywhere to be honest!

So on New Year’s Eve I decided it was now or never. I need to change some things in my life and it seemed the logical place to start… in my former ‘happy place’.

It may have been unbelieveably hot and humid but I didn’t let that deter me from my mission.

I got a filing cabinet for my patterns and a new desk for my machine and overlocker. My coverstitch sits atop my pattern storage as it is not used a frequently as the other machines.

My room now has a pegboard. My sewing reference books, Japanese pattern books, magazines, patterns and tools are neatly put away… and easy to locate.

My pattern storage, pegboard and book shelf.

My pattern storage, pegboard and book shelf. Lots more space on that board!

I have some lovely artwork (with kimono fabric in it!) above my machines. I have all my machine bits & pieces in neat storage cubes under my sewing desk. The ironing board nearby.

I have a gorgeous view and lots of natural light.

My machines, artwork and my lovely peaveful tree tops view.

My machines, artwork and my lovely peaceful tree tops view. This photo has come up soooo ‘yellow’ – the perils of indoor iPhone shots, sorry I don’t Photoshop my images, you get what you get and you don’t get upset! Plus upcoming projects waiting on my chair!

I pulled out all my fabric and all my patterns. I did a massive ‘de-stash’ and then reorganised the lot.

I vacuumed, I dusted, I sweated, I despaired, I swore, I kept on going. It felt good.

I’ve still got some more sorting and organising to do after my holiday but I feel much better. I also feel better equipped to deal with the year to come. I’ve reclaimed my ‘happy place’, somewhere to escape, relax and lose myself.

Wishing you a happy 2017 and that you also find your ‘happy place’, wherever that may be.


2017 – a year of random sewing

$
0
0

… or why I don’t have sewing goals…

It’s that time of the year when most of us focus on what we would like to do for the coming year – in all areas of our lives. I’ve been thinking a lot about a lot of things lately – which in part prompted the sewing room de-stash and reorganisation (let’s not discuss the horrendous mess it had become lol).

It was during The Great Sewing Room Clean Up that I found a postcard I had purchased in Madrid. It says simply “the chief enemy of creativity is good sense” Pablo Picasso. It got me thinking and I’ve hung it on my peg board.


As a general rule I am a goal-orientated person. I can be fiercely competitive and work myself into the ground in order to defend a hockey goal, meet a work deadline/target or get my children to their various activities.

Despite my relentless drive I have little or no interest in setting myself sewing goals.

Perhaps this is because my motivation to sew isn’t often practical. I sew when a fabric inspires me… I am hit by the urge to try a pattern… I am suddenly obsessed with having a specific garment… all of these things and more. My motivation is primarily creative – not practical. 

For me, practical or goal-driven sewing can be stifling. Not inspiring.

So much of my life is consumed by work and family goals, commitments and requirements that I don’t want to be that person here. The blog, or my sewing room, is where those demands, or required behaviours to achieve them, don’t apply. It’s simply where I let things ‘happen’ and that for me is the great joy of sewing. 

I appreciate that’s not how it is for others but it’s how it is for me. So I’m embracing that rather than fighting it. It’s no better or worse than any other approach, it’s just my approach.

In 2017 I’ll simply embrace creativity and see where that takes me.

I will sew and blog when I feel the urge. 

I may sew fabrics from my stash. 

I may sew the jackets which I have traced and have fabric waiting for… but don’t hold your breath waiting for them. 

Tomorrow I may pat a fabric that demands to be made immediately into a dress. I’m OK with that.

No hashtags required. Just random sewing.

Right now I’m in beautiful Tasmania. No sewing just picking raspberries, counting echidnas and sleeping.


Ogden Cami Dress

$
0
0

A quick holiday post, from the spectacular Bruny Island, Tasmania, Australia.

Ogden Cami dress at Bruny Island

I wasn’t ‘in love’ with this fabric when I purchased it, just its drape. Now it’s sewn up I rather love the print

I suspect the True Bias Ogden Cami may be a popular Australian summer sewing pattern with many. I think the sleeveless, casual style & being a pattern for ‘wovens’ makes it perfect for steamy summer days.

This is just another experiment for yet another Ogden Cami Dress ‘hack’ that have been topping up everywhere. Far from perfect but I’ve worn it a few times already, so perhaps a success anyway!

I use the term ‘hack’ loosely. No pattern drafting going on here.

I simply extended the Ogden Cami hemline, flaring it out about 1/2inch on either side from about 1 inch below the armhole. 

Ogden Cami Dress by True Bias Patterns

Back view


I flared the lining piece at the sides I don’t think I would I worry about this modification next time as the cinching in of the waist achieve that soft overlay flare anyway.

I attached the lining to the outside of the cami bodice rather than the inside, treating it like an overlay rather than a lining.

I decided where I wanted my waistline to be and allowed for a slight blouson effect.

Ogden Cami dress - side view

Ogden Cami dress – side view

To create the waistline, I attached bias tape to the inside of the dress. I first stitched along the inside of the bias tape, along the fold line. I pressed it downwards and edge stitched along the other edge of the bias tape.

Ogden Cami dress - internal - waist elasticity casing & hem.

Ogden Cami dress – internal – waist elasticity casing & hem.

I left a stitching gap and then threaded some 1/4in elastic into the bias tape channel.

I turned up the overlay and dress hemlines with more bias tape – and hand stitched the hems in place.

Nothing fancy but it’s quite a cute little dress for summer.

Pattern: True Bias Ogden Cami, modified

Fabric: rayon/linen blend fabric on Lincraft

Location: water shots at Jetty Beach on route to the Cape Bruny Lighthouse, Tasmania. An incredible day in an amazing place in the world. Not overly ‘touristy’ just divinely beautiful, unspoilt & the journey ‘off the beaten track’ is well worth the effort.

PDF patterns – let’s talk

$
0
0

I’m interested in hearing people’s experiences, thoughts and suggestions about the supply of PDF patterns – and I think people are interested in talking about it too. 

I’m not talking about the companies, independent vs Big 4, their designs, grading, ease or sizing… just simply the supply of PDF patterns.

Over the Christmas break I decided to sew a shirt using a PDF pattern I’d purchased in a sale. It turned out I didn’t sew that shirt as I couldn’t stomach sticking together 40+ A4 pages on an exceptionally hot summer afternoon.

I decided to clean my sewing room instead. It’s interesting that I considered my time was better invested spending days tidying my sewing room rather than sticking together A4 pages on one afternoon. I think that’s because no one else could/would tidy my sewing room but there are other ways a pattern can be supplied or printed.

I posted on Instagram, curious how other people felt about PDF patterns, how many disliked the A4/letter assembly… was I just precious?

The post generated over 180 comments. Some people love pdfs, some loathe them and others lie in that 50/50 camp of love/hate. And for some, such as myself, the love is conditional on how the print file is supplied.

My experience

I do like PDFs as storage isn’t an issue until you print them. I usually trace them off & read the instructions on my phone/iPad or print the instructions (if I feel I need them) in booklet format to save paper. I rarely keep the actual printed pattern once it’s traced.

I do like paper patterns and have an extensive collection. However with some paper patterns I’ve purchased online I often pay at least $10 postage in addition to the cost of the pattern. I can print an A0 sheet for $4.10. So in some cases the cost is much the same.

PDF A4 (or US letter) assembly patterns

I have tried glue, sticky tape, a paper trimmer, using a huge window, doing them in sections. I can do it quickly, efficiently and precisely. That’s not my issue. It’s not that I can’t do it – I loathe doing it. Like many people, I am time poor and I have become very ruthless with how I allocate my time. I’m also quite intolerant of having my time treated as ‘disposable’.

I’m OK with about 15 or so pages. I think once you reach in excess of 25 pages, as a business you may like to consider the customer experience of the pattern.

Printing

I think there will always been a need to supply A4/letter print formats – the availability of this type of printer is widely available & often in the home or workplace.

Some people do not have access to commercial large format printers. So the choice will always be paper patterns (commercial or independent) or using their home printer for smaller A4 or US letter sheets.

I don’t print my patterns at work. I print at home or use Officeworks (a chain stationary store that also supplies printing services) for large format printing. I have a strong preference for PDF patterns that are provided in A0 format. I dislike patterns that require me to find a commercial printer with a plotter – the patterns which require ‘roll printing’. They are often located in professional design/engineering offices that often don’t supply printing as a normal business service so that in itself is cumbersome to navigate – and frankly… I can’t be bothered.

Here in Australia, many larger regional centres and most city areas have access to a stationary supplies chain store Officeworks which offers A0 printing services for $4.10 per sheet. I know it’s not the case for everyone but I’d rather pay that & I have my time back.

I understand the ‘immediate satisfaction’ that some love, being able to print & immediately start sewing. I tend to plan in advance due to my limited time to sew. So that for me isn’t an issue.

Feedback

I have been contacted by a few designers since that Instagram post. And one of the things that stuck in my mind from those emails and messages was that some companies hadn’t considered  the end-user experience or how we might access printing for PDF patterns.

They also inquired what printing was available. From the instagram comments, it’s evident that printing is largely dependent on location in a metro or regional area – and country.

I did think about creating a Google Forms document to collate the data – however I’m not in the business of advising companies how to run their businesses. I just see this as a discussion forum. If they are interested (and the response to the Instagram posts indicates they are) they can read your comments. 

I think it’s important to acknowledge that a company has a target market and will supply their product accordingly. If they aren’t interested in growing their market share by modifying their product to suit the needs of a new set of customers – that’s absolutely fine. It’s their business.

How you would like your PDF files supplied? What’s your country of residence, printing costs/availability and file type preferences?

Note: I have no financial interest or affiliation with any pattern company. I’m also not in the business of advising pattern companies. This is simply a sewing community discussion.

… I’m going to let this discussion run its course so I may not reply to every comment. I’ll be reading them though. I’ve got a lot going on right now so if I’m quiet that’s why.


Musings: where to from here…

$
0
0

I find myself knee deep into 2017 already… and not quite sure ‘where to from here’…

I’m still sewing… although hit some hurdles. So what I have been doing?

Life…

Every year my life goes into overdrive between October and March. The pressure is constant. I am quite resilient, very organised but I’m exhausted during the peak period and completely knackered at the end of it.

While the peak of the workload culminates in a rather fun presentation… it is preceded and followed by oceans of work.

Last year I made my dress for this event however I didn’t make my dress this year. When you are working on an exceptionally tight deadline, sometimes you need to be kind to yourself. So I popped out in my lunchbreak the day before the night, tried on one dress, it fitted and I wore it – some days it’s best not to overthink it (even when you have shocking tan lines!).  I was stopped the following day by a lady and her husband to tell me how much they loved my dress and they were dying to know what it was made from. I laughed and said “Sequins and attitude“.

I’m glad I did buy it, one less thing to think about. I dread dressing up but yet when it comes to the actual event, I absolutely embrace it and love every minute of it. A reluctant party girl I guess! Note: I’m rarely this glamorous but heck it’s fun to indulge every now and then.

Definitely not made by me!

Definitely not made by me! Rushed and somewhat scruffy lift ‘selfie’. Bonus dirty mirror photo for earrings and on the way out for drinks after!

Trust me I do prioritise my life – and I am only doing what needs doing these days (2017 is My Year of No). However with kids to care for and a mortgage to pay (and they are rather high in Port Macquarie and good jobs are scarce). My job is demanding and more often than not exhausting, working 5 days a week and getting through each day, afternoon and evening is a trial in itself!

My youngest started high school and I’m still trying to find the rhythm of a new year and all the activities that it involves.

I’ve started hockey training again. I doubt I’ll ever be much of a hockey player but it’s fun and I love the team. I’ve been trying to run a few kilometres a week as well… when time permits.

I’ve had some friends who have been amazing and kept me somewhat sane during some challenging times lately. Several times I’ve deleted all the social media apps to give myself some space. I log back in every now and then and then I’m gone again for a while – there’s a lot to be said for social media holidays.

My phone died so rather than being annoyed by that I’ve just embraced being communication-free most of the time (well apart from the deluge of work emails of course). The lack of ‘noise’ is nice and while there are some people and conversations I miss, I’ve learnt to live with that.

Sewing…

Yes, I still think about it constantly, daydream and plan.

I’ve made a few garments… started several and stopped. Washed fabric and sorted through patterns. Traced patterns. Maybe like a glamorous event, I just need a bit of inspiration to get started again.

I made a lovely Grainline Archer in a foiled crinkle cotton – and haven’t managed to photograph it. I’ve worried about how it will photograph as the foil makes any creases quite savage although I’m pleased with the shirt itself. That aside, I found it really relaxing to indulge in the process of shirt making, I love all the details and steps. Perhaps I need to go back to sewing things I simply love. Dresses, shirts, jackets… I think I might attempt a dress to wear in Brisbane in April.

Grainline Archer - the ruffle back!

Grainline Archer – the ruffle back!

We have had an appallingly hot summer with record-breaking temperatures. I think we have survived three heatwaves this year, with temperatures rocketing to over 40 degrees Celsius. A couple of weekends ago it was 46.5 degrees(!) so the thought of sewing has been rather unbearable so far this year. Fortunately the temperature has dropped to a balmy 28 degrees most days – which is our usual summer temperature and it’s utterly delightful by comparison.

Confidence…

Self confidence. I feel like anything I might sew is going to end up a disaster. I feel like that about most things at the moment! I think most of us hit that hurdle at some point, for whatever reason.

Sewing doesn’t solve life’s problems but it certainly helps me relax. On the days when I’ve had time to sew and not known what to do or where to start, I’ve simply laid on the floor of my (tidy!) sewing room and quietly daydreamed/worried/thought/planned. There are worse things to do. It’s nice to have a ‘space’ for me, as Virginia Woolf once wrote ‘A Room Of One’s Own’.

Blogging…

I can’t quite figure how or when to take blog photos. This has been a big issue in the last year and it’s even harder now… maybe I need a tripod and a remote. That’s another project to find time to research/purchase.

I always found the process of writing a blog post the best way to move onto the next project. There is something about the consideration, the writing and assessment in a blog post that helps me mentally sign off on a project. I miss that.

The question is… 

Where to from here… well at least in this blog space?

hmmmmm, good question. I have considered not blogging. However I love the connection blogging provides and the way it makes me reflect on my projects. I also love having a record of my sewing. And that’s all I really started blogging for. Simply to communicate and record my makes. That’s really all there is to my blog. So that’s what I’ll continue to do.

So once I figure out how to get the blogging back on track, I’ll be back.

I know. What a waste of a blog post. If you haven’t fallen into a coma by now, thanks for hanging around.

See you sooner rather than later hopefully. Maybe with a Shining Archer!


The Shining Archer… Grainline Studios

$
0
0

or the Twilight shirt… it reminds me of how Edward’s skin in the Twilight movies sparkles like diamonds in the sunlight.

This is yet another project that has taken me forever to blog. I finished this shirt just after Christmas. The threat of rain inspired me to get out late this afternoon & get some shots! My kids love this shirt.

I’ve been obsessed with sewing some more shirts. I really enjoy shirts, shirtdresses… all those little details and pieces really appeal to me.

I sewed the Archer several years ago – my first shirt… in silk no less!

I’ve always wanted to return to this pattern but there have been many distractions since then.

Last month I picked up some ‘foil’ crinkle cotton from The Fabric Store in Brisbane. I would describe it as fancy cream-coloured cheesecloth – that lovely, soft cotton, crinkled fabric – coated in a light silvery foil. It seemed appropriate to sew my own Shining Archer – as knights in shining armour are a bit thin on the ground these days.

Grainline Archer Shirt - front view

Grainline Archer Shirt – front view

The texture of the fabric had put me off. I was concerned that it might stretch and distort as I sewed. My concern was misplaced as it proved to be very easy to work with.

I opted to make the Grainline Studios Archer in View B with the ‘ruffle butt’ feature.

I sewed size 0 and while it’s oversized by nature, in this shining fabric I feel like that over-sized fit looks more exaggerated. Any folds or excess fabric catches the light and highlights them.

Grainline Archer Shirt - back view

Grainline Archer Shirt – back view

Grainline Archer Shirt - back view

Grainline Archer Shirt – back view. Afternoon breeze makes this look more fitted than it is! LOL

I decided to leave the pockets off as the fabric is so light and delicate that the pockets felt too large and heavy.

I often sew with a similar RTW garment beside me – to check details, techniques and so on. I noticed in all the RTW shirts in the house that the sleeves has been set-in with flat felled seams. I also wanted to do this as the fabric is quite sheer and I didn’t want to seam allowances to shift about and look untidy. I think those little details really irritate me.

Unfortunately I realised this after I had cut out all the fabric – and I hadn’t allowed enough in the seam allowances to accommodate this… so I just faked them by top stitching down the seam allowances. I’m a little disappointed however the outside finish is still quite nice. It’s our little secret.

Grainline Archer Shirt - side view

Grainline Archer Shirt – side view. Again – more afternoon breezes!

Grainline Archer Shirt - side view

Grainline Archer Shirt – side view

I also attached the collar using the Four Square Walls method. I always hand stitch the lower edge of the inner collar band in place before I top stitch the band. I had a little giggle when Handmade by Carolyn posted about how she does this too – I had always wondered how many others couldn’t achieve a neat collar finish without the help of a little more hand stitching than a pattern dictates! I think it results in the neatest finish and as I tend to sew a shirt over several shorter sewing sessions, a little more time spent hand stitching really isn’t onerous.

I will also confess that I often machine baste a line of stitching along the finished stitching line of the collar band and then press a crease along this before I sew the collar. Then when I do go to turn the collar band edge and hand stitch it in place, it is precise. Pedantic I know.

I also hand stitch the inside of the cuffs closed before top stitching the cuffs as… I guess I can just be a little obsessive about the strangest little things. I’m a little bothered by my cuffs rather ‘flappy’ ends and thinking about putting a second button on them to keep them neat against my wrists.

Grainline Archer Shirt - the cuffs

Grainline Archer Shirt – the cuffs

I know some replace the Archer plackets with tower plackets, I opted to stick with the pattern. This fabric is so light and sheer I preferred the original more delicate plackets of the Archer pattern.

Really there is not much more to say about the Archer. It’s a nice reliable staple shirt pattern.

I uncovered my David Coffin Shirtmaking books during my sewing room clean-up and I can see more shirts in my sewing future.

Pattern: Grainline Archer
Fabric: Foil Crinkle Cotton, The Fabric Store (Brisbane)
Also see: my all-time favourite Archer…. True Bias. And just Google Grainline Archer – this has been made over and over and over again!

Random: I’ve been running 5km a week for the last month, just on Saturday mornings. It’s a bit of a new year’s resolution that I haven’t ignored. While I hate ‘times, ‘weighing’ or anything that numerically tracks my progress, today I took another 96 seconds off my time. I’m not fast or pushing myself too hard but I’m doing OK for starting at ‘ground zero’.


Flint Pants, Megan Nielson – in tencel denim

$
0
0

aka ‘I can’t decide where to crop these pants!” #shortpersonproblems

These are the Megan Nielson Flint Pants (typing this on a Sunday night so excuse rambling – questions? Ask in the comments below).

I whipped these up fairly quickly then hit an epic state of indecision about length. They are drafted for 5 foot 9… which my 5 foot 4 falls a little short of.

So once I finished the main part of construction I think they lived in the WIP pile for about 3-4 weeks before I fixed up the waistband issue (later in post) and the length decision.

Fortunately Bimble & Pimble‘s recent Flint post and Funkbunny‘s Flint post on instagram inspired me to ‘Just Do It’ (thank you Nike). So here we are with my Flint Pants #notsurebutwearingthemanyway.

Megan Nielsen Flint Pants

Megan Nielsen Flint Pants. hem looks a bit out… could be stance as they seem quite straight when I’m at home looking in the mirror. That said I suspect it is because I made a curved waistband piece and that has impacted on the finished hem. These photos were also taken from a squatting position (the secret to not looking too short!) which probably also exaggerates the hem line. Something else to worry about…

The Flint pattern is described as:

Wide leg cropped pants or shorts with unique crossover closure at the side seam. Pattern sits on the natural waist and features hidden closure at the left pocket , release tucks at the front, darts at the back, slash pockets, two waistband options and two lengths.

Version 1 is a pair of above ankle cropped pants with button closures. Version 2 is a pair of above ankle cropped pants with tie closure. Version 3 is a pair of shorts with button closures. Version 4 is a pair of shorts with tie closures.

Skill: 2/5

Sizing: XS-XL (each pattern includes all sizes)

Finished waist measurements range from: 26 inches to 34 inches
Finished hip measurements range from: 39 to 46 7/8 inches

SIZING

I sat on the cusp of XS, verging towards S (actual body measurements – which you can find here) and opted for more ease around my hips and decided to make S. Plenty of room but I think I would stick with this size. The crotch feels quite ‘low’ but doesn’t look like I’m having an MC Hammer moment so the comfort factor is a winner for me. Perhaps a XS might have sat up higher and closer to my actualy waistline. The pockets sit nicely and don’t pull out of shape when I slip my hands into them.

Perfect weekend or holiday pants for me.

Megan Nielsen Flint Pants - front view

Megan Nielsen Flint Pants – front view

LOVES

AO Pattern Sheets: I purchased the PDF pattern. Megan Nielson provides A0 files (as well as A4/US letter) and that makes me far more inclined to purchase!  Yes, it is expensive to print 3 A0 sheets but being time poor I’m happy to pay for the service. I’ve printed far too many A4 sheets, felt sick at the thought of sticking them together and find an easier option.

Megan Nielsen Flint Pants, side view

Megan Nielsen Flint Pants, side view. More mullet hem moments.

Construction: EASY. Clear and well illustrated instructions. I opted for a trouser slide closures and two snaps rather than buttons or the waist tie (as cute as that is!).

Fit: To be honest when I first put them on, I did a slight happy dance about the butt and hip fit. They are comfortable and don’t seem to do ‘weird stuff’ or pulling when I move – walk my enormous dog at the beach. The folds you see here have more to do with the intermittent sea breeze and grappling with an over-excited large athletic dog that unexpectedly flips about like a possessed soggy noodle.

Megan Nielsen Flint Pants - yes, definitely pants!

Megan Nielsen Flint Pants – yes, definitely pants! Jody and I do an epic butt/splayed leg shot for you! You’re welcome.

ISSUES

Length: Waaaaay too long for me. Tall sewists rejoice – this one is for you! Perhaps this cropped wide leg thing isn’t for me… but surely everyone needs one pair of ‘big comfy pants’?

Construction: Ummmmm… pretty sure I had a sewing idiot moment and my closure is on the wrong side. Good news? I appear to be ambidextrous in regards to dressing/undressing. I’ve managed to get them on and off without a problem and you can’t tell as I don’t want to wear them with a bodysuit (Rowan) so I’m ok with being a left/right/whatever oddball.

Megan Nielsen Flint Pants - side view

Megan Nielsen Flint Pants – side view

Waistband: I used a heavier interfacing on my first waistband. It stood away from my waist/back and I think the ‘straight’ design of the waistband didn’t help much either. I dithered about this problem for a fortnight, whether I could live with it. Decided I couldn’t. Dithered some more. After doing a little research I made a new waistband pattern (personally couldn’t call it ‘drafting’ as I’m not that technical) and put on a new waistband and used lighter interfacing (teach me to just use ‘whatever’!).

Megan Nielson Flint Pants. waistband

Megan Nielson Flint Pants. waistband. Ye gods, I hate my stretch marks – however the waist sits much more snugly against my back and waist with the curve in the pattern piece. Worth the unpicking, re-cutting and sewing.

I unpicked the existing waistband and reattached the new one (two pieces – outer and inner pieces). Worth the effort. So much better!

How to alter the waistband? I drew a line along the centre of the waistband lengthwise. I added a seam allowance and cut along this line. I then almost cut through the pattern piece at the sides and centre back – leaving enough to create a ‘hinge’. I lapped the cut 1/4 inches at the side and 1/2 inch at the centre back. I’m not technical and found some of the online tutorials really helpful but more detailed than I needed them to be (for an non-techno person like me). However, here are a few if you are interested: Handmade by Heather, A Fashionable Stitch, and In The Folds. My recommendation? Read them all, google some more and use whatever bits make the best sense to you.

Megan Nielsen Flint Pants, back view

Megan Nielsen Flint Pants, back view

Length: I found these sooooo long but then they aren’t drafted for my height. Firstly I cut them off at the finished length… then I think I cut off another 3 inches before hemming them. I still feel a little odd in them. Maybe I’d prefer them in heels but heck, they are so damn comfortable I’m happy enough in my billowing tencel denim pants, bare foot on the beach.

FINAL THOUGHTS

I quite like them. Despite my reservations about the leg fullness and my height (or lack of) in cropped wide pants. For me, they are more casual wear, I’m probably still more inclined to wear slim, straight jeans or higher waisted wide-legged trousers for ‘occasions’. However for an autumn afternoon at the beach I was pleasantly surprised by how comfortable and at ease I felt in them.

They are incredibly comfortable and I’m much happier with them after altering the waistband piece. I think they would have ended up in the ‘unworn pile’ without that simple adjustment. they sit and look much better around my waist. I am so glad I procrastinated and then went back and fixed them rather than just thinking ‘that will do’.

Personally, I think I’d recommended a fabric with some drape for this design. I suspect they would look, move and fall very differently in something with more structure. I like the way they swish in this soft tencel denim, very comfortable and flowing.

I’d rather like to try these as shorts with the tie waist option. I don’t wear shorts often but it seems to be appealing to me.

DETAILS
Pattern: Flint Pants/Shorts, Megan Nielson (purchased by me)
Fabric: Tencel denim, Spotlight Australia. This one doesn’t seem to crush as much as tencel denim usually does!
Also See: Megan Nielson Tester Round-up  |  Bimble & Pimble

In case you have been missing the little chap… Banjo returns

Banjo - the ultimate beach whippet.

Banjo – the ultimate beach whippet, crazy and alert as ever.

Megan Nielsen Flint Pants in action

more puppy action

Other news… running

I’m still running… yes, surprised even me – which explains the MASSIVE Garmin watch I’m sporting in these photos, it keeps me motivated so I wear it like an exercise newbie/nerd. I feel so much better, physically and mentally. Maybe it’s the ‘time out’ it provides me and the post exercise buzz.

I find myself loving Park Run (maybe not so much at the time) and in a supportive local running group called The Plodders. I don’t feel like a ‘runner’ but I feel the urge to run and the desire to ‘do better’ whether it’s pace or distance.

I even ran on my Easter break. Nothing epi but clocking up about 11km in two days.

I even ran on my Easter break – this is me red-faced after Forster Park Run not achieving a PB but heck there was a hill. TWICE! Nothing epic but clocking up about 11km in two days. My Sunday run saw me knocking out some sub 5 minute km times *puffs chest out with pride*

I never ran much as a child/teen. I was not disgraceful considering my ‘zero’ training, I’d just go out and run when I had to. Sometimes ending up at zone for cross country or on the school relay team for sprints – I wasn’t considered athletic so I never trained, I was ‘academic’ ‘musical’ and definitely not a ‘sporty girl’. Then at boarding school, one of my teachers entered me into a 10km race. I was 16. I’d never run that far and I was outraged about having to run 10km in a ‘race’ in the middle of the day. The heat nearly finished me, I was dry retching at the end (charming) but came second in my age group… it put me off for a long time. He told me at the time “I think you’re ‘a runner’. You don’t see it in yourself. One day you will.” Time will tell.

My Park Run record is now 27.02 minutes (my first ‘running’ Park Run was 32.23 on 4 February 2017). I volunteered at this week’s Park Run so I set out to achieve a PB in the afternoon and knocked out a 25.27 5km much to my surprise (and pride). I’ve entered a 10km event in June (South West Rocks), July (Gold Coast), September (Forster)… and will also do the Sydney City to Surf. Why not?

Running has given me back my ‘mojo’, confidence or whatever it is. I feel energised, inspired and more myself than I have in a long time. Not just for running, but sewing, work and more. Sometimes you can’t change things, you simply need to change your attitude.

Why wouldn't you drag yourself out of bed with a morning sunrise like this!

Why wouldn’t you drag yourself out of bed with a morning sunrise like this!

And holy crap… my blog just turned FIVE!


Vogue 9204 – a simple shirt for a complicated skirt

$
0
0

Note: I didn’t make the skirt!

Vogue 9204 – the shirt… the skirt was a fortune ‘find’ and shows more of my legs then usual!

I did however make the blouse to pair with the skirt.

This pattern is a bit of an ugly duckling – or perhaps more kindly, a hidden gem. Vogue 9204 is a Very Easy Vogue pattern with somewhat uninspiring envelope art and a sample garment in a busy print that disguises the garment’s design lines.

Vogue 9204 - image from Vogue Patterns, McCalls

Vogue 9204 – image from Vogue Patterns, McCalls

It’s a simple pullover top with a collar that extends into ties, lined yoke with back pleats and a shirt tail hemline.

Vogue 9204 - back view

excuse the creases – car travel to somewhere without a strong onshore wind required! Bad hair day to top it off… all the running means I pay less attention to my hair lol… true story…

There are no darts and the front v-neck is finished with a simple facing.

The fabric…

I’ve made this in a woven tencel chambray which I purchased on holiday from Ruche Fabrics in Launceston, Tasmania. If you happen to be in Launceston you should pop into Ruche. It’s the Tessuti Fabrics of Tasmania in terms of fabric quality & style.

While I love this fabric, it does show every crease and seems to amplify the shadows/ripples as it falls over your body or with movement. I don’t notice this when I’m wearing it but it’s obvious in photography.

Regardless of these gripes, the fabric is divine and very fluid.

Vogue 9204 - side view

Vogue 9204 – side view

The skirt… not made-by-me

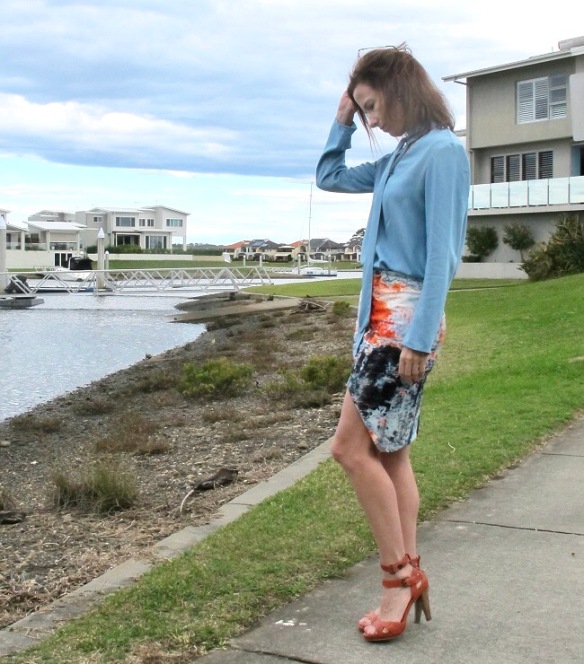
The skirt… it’s hard not to notice isn’t it?! It was called the ‘fire & ice skirt’ by Bec & Bridge. It is fully lined and has a very deep back hem facing so the front cut away doesn’t show the reverse of the fabric at the back of the skirt. It’s some type of scuba-like fabric. I paid next-to-nothing for it, one of my unexpected finds, the fabric print drew my eye on the rack and cost me less than a coffee (yes really). It’s shorter than I usually wear but maybe it will be ok for a ‘night out’ or drinks with friends, we will see. I’m sure it will be readily adopted by my teenage daughters in due time.

Thoughts…

I deliberately chose this shirt design for its austere simplicity combined with a slightly sassy neck tie. I wanted something to quietly complement the skirt rather than compete with it.

I haven’t quite decided how I prefer to tie this… and I haven’t tried a low loose bow. The ties seem longer than the pattern illustration and I’m toying with the idea of unpicking the hand stitching on the inside back neckline and shortening them slightly… but maybe not.

I really like this simple pattern. I think I may make another in silk and/or rayon to wear as casual tops with jeans. It would also pair beautifully with a pencil skirt for work. It’s a nice change from a collared shirt yet not totally lacking in interest.

It’s a very fast make and if you can ‘burrito’ your shirt yokes, even faster. There is a small amount of hand stitching around the back neck to finish the tie neck.

Pattern: Vogue 9204
Fabric: Tencel chambray, Ruche Fabrics Launceston. Purchased in January while on holidays.
Skirt: RTW, Bec & Bridge, not current range

Thanks to my friend Susan of Measure Twice, Cut Once who lightened up my photos for me to actually show the top & skirt in their true colours (I’m not technical in this regard) and saved me taking more (clouds descended and the weather turned nasty/cold as these were taken making the colours very murky).

RUNNING

Still running! Park Run official time down to 26.02 minutes and I recently finished 10kms in 55.03 minutes. It’s four months since I attempted to run/walk my first Park Run. It’s been a lesson in persistence and perhaps sheer bloody mindedness 🙂

I’m trying to fit 20+ kms into my week. Yesterday I did Park Run (5kms) and then a steady 11.5kms with friends in the late afternoon as I had a hockey game at night. We trotted out for another 5kms as the sunset this evening so I could tick off 21.5km this weekend and a total of 29.5kms over the week.

I’m slowly learning to approach different runs differently. Some are more about pace, others about distance and others about time on my feet. Sometimes I run and chat with friends. It’s been a really interesting process. I’m not terribly scientific about it, I simply do what works for me and feels right/sensible.

I had a complete brain fart & upgraded my July 10km event to a half marathon… I decided I just need to finish my ‘first one’ and then I can work on my time over this new-to-me distance… can’t be that hard… can it???


Sadie Slip Dress in tencel ‘denim’

$
0
0

I’ve been daydreaming about a bias slip summer slip dress in denim, maybe I’m stuck in the 90s. I’m ok with that, the music was great!

I guess it seems counterintuitive to sew a bias-cut dress in one of the heavier fabrics in the sewing galaxy. However I simply couldn’t shake this idea and here we are…

Sadie Slip Dress

Sadie Slip Dress, pattern by Tessuti Fabrics

This is the Sadie Slip Dress from Tessuti Fabrics.

I have loved this pattern since its release. If they agree with you, there is nothing more lovely to wear than a bias-cut dress. The way bias fabrics can slide and glide around your body as you move is simply sexy sinuous heaven to wear compared to a dress cut on the straight of grain that ‘hangs’.

Yes you can see my bra straps. No apologies. I intended to wear this over a tshirt but haven’t got around to making it yet. It was such a beautiful winter afternoon I decided ‘what the hell! Let’s blog this dress today!”. How gorgeous is this weather – 20 degrees at 4.30pm in the afternoon. The tshirt can wait (and to be honest… I’ll wear it with my bra straps showing… tsk tsk… #wildchild).

This is a ‘tencel denim’ rather than a traditional denim you use for jeans. Cut on the bias, it has a lovely satisfying weight about it to wear.

A simple summery slip dress. Sadie Slip Dress by Tessuti Fabrics

A simple summery slip dress. Sadie Slip Dress by Tessuti Fabrics. I STILL have my summer tanlines halfway through winter!

Shoestring straps

Turning narrow straps can be frustrating. However if you get your hands on something like the Dritz Tube Turners, life gets much easier. If you are a DIY sort I’m sure you can rustle up a similar set using piping/straws/skewers. I purchased my set after seeing a little twitter clip by Claire-Louise of the Thrifty Stitcher. She shares lots of useful tips and tricks – well worth the ‘follow‘!
I found my set on eBay. This youtube video is gives you a clear idea of the way they work.

Length

I haven’t hemmed this – yet.

Yes I’ve photographed and blogged it anyway as I am a little undecided whether to leave it this length or cut some more off. I find taking photos really helpful to make these decisions. So let’s consider this Sadie ‘a work in progress’.

I cut 4 inches off the length of this pattern before I even cut into my fabric. Rachel of Boo Dogg provided some sage advice about the length of the drafted pattern as she has made this a couple of times (you will find them on instagram, she’s not blogged them).

I’m 5 foot 4 for the record. So if you are about my height you might like to consider adjusting the pattern before you start.

Sadie Slip Dress, back view

Sadie Slip Dress, back view. I’ve use the back darts for additional shaping.

Facing

The instructions have you turn a narrow hem on the edge of the facing. If I was using silk, I probably would do this. As I was sewing in a heavier fabric, I opted to just overlock the edges of my facing to minimise any potential bulk in this area.

I used a suitable interfacing for this fabric, nothing too heavy. I also very carefully understitched the facing… yet the front edges still want to roll out along my bustline (which results in lots of awkward fiddling!). I really wish I had increased to depth of the facing pieces (more like the Odgen cami facings – you can see them in this sewalong post on True Bias. Compared to the Sadie facing pieces seen on this Tessuti blog post) as I think this may go some way to alleviating the tendency of the facings to roll out.

I’m going to stitch the facing sides down as per the Odgen cami construction and maybe try a tiny weight in the centre front of the facing. Fingers crossed.

Sewing with the Bias

Bias is notorious however I’ve never had too much drama sewing garments cut on the bias. I minimise all handling. I gently roll or fold my fabrics up, I never pick them up and hold them up. When I sew, I try to make sure the fabric is not sliding or hanging off the edges of my table. I try to minimise anything that might encourage ‘stretching’.
The Tessuti instructions are excellent and has you use tearaway Vilene to stabilise the neckline. I skipped this, thinking the fabric was reasonably stable and if I was gentle, the neckline should not distort during construction. I was lucky – it didn’t. Perhaps with silk or a similar fabric you might like to consider using Vilene to stabilise the neckline.

This pattern has optional back darts for shaping if you use fabric with less drape than a silk. I have used these darts on this dress.

Thoughts?

I do love this pattern. Great pattern, would make a simple summer dress, a sexy cocktail dress, a slip to wear under sheer dresses, a lovely nightie. Endless possibilities. A good pattern for $10.

The instructions do have you create full flat pattern pieces as you are cutting on the bias. So you may need to consider your paper supplies or pattern paper supplies when getting ready to make this.

Now to cut this off more or leave it be… I think I rather like this between-midi-and-maxi length… but perhaps tomorrow I will think different.

Pattern: Sadie Slip Dress, Tessuti Fabrics.
Size: XXS
Fabric: Floral Tencel Mid Wash, Spotlight Australia

Sadie Slip Dress, back view. Sewn in lightweight tencel denim. Pattern by Tessuti Fabrics

Sadie Slip Dress, back view. Sewn in lightweight tencel denim

Running
Last Monday I ran 18kms in 1 hour 43 minutes after work – just to see if I could. I have increased my distance considerably in the last few weeks – against all sound advice – and fortunately have not injured myself  in the process (yet!).
Then I came down with ‘the flu’ on Tuesday. Less than 2 weeks out from my first half marathon – I was gutted! I’ve recovered reasonably well but think my time might be a bit slower as a result. When it’s your first half marathon, anything is a ‘personal best’ – bonus.
Next weekend I shall be busy:- running and running and running!

Sadie on the way to the beach

Sadie on the way to the beach. Yes it’s winter here. I know. Poor me.


The day everything changed…

$
0
0

(I’ve got a few sewing related posts waiting for you… but they aren’t quite ready, I’m far from home & this is a story I’m going to tell, quite simply because I’m here to tell it.)

Life changes so quickly.

In July I ran my first half marathon. It was a big ‘thing’ for me, having started running in February. While it’s tough, running is joyful for me. It’s distracted me from sewing and everything else. If I wasn’t running… I was thinking about running.

Gold Coast Half Marathon 2017

A little overwhelmed I was actually finishing this ‘thing’

I hoped to finish in under 2 hours, 15 minutes… I finished in 2 hours, 4 seconds.

So I entered the Brisbane Half Marathon at the beginning of August – those 4 seconds annoyed me. I loved this course and finished in 1 hour, 58 minutes & 33 seconds. The course was a little long & Strava tells me my new half marathon ‘personal best’ is 1 hour, 57 minutes & 10 seconds. Satisfying & still plenty of room for improvement as I fell apart a bit in those final kilometres. Running is funny like that, some kilometres are just so so tough even when you know you are so close to the end.

Brisbane Half Marathon 2017

About 12kms into the 21.1km course and obviously feeling great!


The following weekend, I completed the famous Sydney City 2 Surf. A 14km run from Sydney city to Bondi Beach. With over 67,000 participants, this is a MASSIVE iconic event – and a tough one. I finished in 78 minutes, surprising myself with my refusal to ‘give up’ even when I desperately wanted to and ran in the last kilometre at 4.40 pace. I finished in the top 9% of female competitors and my age group.

Sydney City 2 Surf 2017

Airborne & just relieved it is over!

So I signed up for my first marathon in October… I just run, but I thought maybe if I developed a training plan I could get faster and also run further…

Just three days later, my life took a dramatic turn.

Long story short, late on Wednesday 16 August I was hit by a hockey ball in my right throat and it dissected my carotid artery. A life threatening injury. I had no idea. With no visible bruise, swelling or damage, I just carried on with life.

I felt progressively worse as the days wore on & when I finally did get what I thought was ‘just an annoying swollen gland’ reviewed, I was immediately admitted to hospital and airlifted to Sydney’s Royal North Shore Hospital for review and treatment. The obvious concern & trepidation of all the medical staff told me one thing, I was in serious trouble.

And so began the relentless days and nights of monitoring, tests, reviews and procedures to make sure this ‘thing’ didn’t claim my life.

It’s been one of the most traumatic experiences of my life. To be confronted with my own mortality. Reality can be a very ugly thing and sometimes the only way out of a very difficult situation is to just keep moving forward one step at a time. Don’t think about the next day or week – just focus on getting through the next hour. Even when it is as scary as hell.

I’m now in the neurological ward. I’m the patient who looks absolutely fine, is mobile, has all their cognitive abilities in tact yet is a bit broken on the inside. The medical team are incredulous I’m still here. Apparently I’m pretty tough… and extraordinarily lucky.

The ugly reality

I’ve been overwhelmed & humbled by the support, concern and love that’s rolled in for myself & my family as we get through this. And the amazing strength of my family as they have stood by my side as a very physical & emotional tsunami tore through my life.

Needless to say I won’t be running for a very long time. I’m in hospital until they figure out the blood thinners to prevent clotting and to see if my body will heal itself. I’m hoping to be back home next week and to find my new ‘normal’. It’s going to be a long road to recovery and maybe the destination won’t be the same as where I came from. 

Things may never be quite the same again. 

I’ll never be quite the same again. 

But against all the odds, I’m still here.

Life is precious. 


A Beach Brumby Skirt

$
0
0

Brumby Skirt, Megan Nielsen Patterns
(Made and photographed pre-hockey ball incident – see end of the post for an update)

Brumby Skirt, front view

Brumby Skirt, front view and a peek-a-boo greyhound

Really there’s not much to say about the Megan Nielsen Brumby Skirt that hasn’t been said before.

Described as “Gathered skirt with deep scoop pockets. Pattern features exposed zipper and contoured waistband sitting on the natural waistline. Version 1 is above the knee and includes pockets. Version 2 is midi length, includes pockets and additional fullness. Version 3 is basic knee length gathered skirt.

I made Version 1 and lengthened it by approximately 2 inches – sorry, the exact measurement escapes me at the moment.

I’ve been eyeing off this pattern for a while, not quite sure about the outcome on me though. Makes me look curvier than I’m used to. That’s not a bad thing, it’s just a different silhouette to my usual choices.

Brumby Skirt, side view

Brumby Skirt, side view

I found this denim fabric at the op shop, 2 meters for $3. It’s actually really lovely fabric. Very soft and it was also very narrow, less than a metre wide. So it was a struggle to find any pattern suitable for the width & meterage.

Top Stitching

In the past I’ve had dramas with top stitching with ‘actual’ top stitching thread and tended to use Gutermann’s upholstery thread as a substitute.

I’ve invested in some proper top stitching needles for my machine and they are worth every cent. The larger eye makes all the difference. I purchased mine from Punch with Judy (Australian online supplier).

Exposed Zipper

I’ve never been a huge fan of exposed zippers but this one does not feel to ‘obvious’. I inserted it using this tutorial.

Brumby Skirt, back view

Brumby Skirt, back view

A very easy pattern and a fun sewing project.

Pattern: Brumby Skirt, Megan Neilsen
Fabric: vintage denim, op shop $3.
Tshirt: Uniglo (no longer in stock. Sorry!)

More blogs posts coming soon!

Me…

Thank you so much for all your kind and supportive words. I wrote that post from my hospital bed on my iPhone during one of many sleepless nights. I’ve been a little overwhelmed by my experience and its subsequent impact on my life to reply to the comments, perhaps things are a little too raw & real right now… but I read every single one and your kind words, positive thoughts and prayers helped me through some of the darker moments.

I’m not fixed. After an angiogram, they opted not to put a stent in my neck – which is good news due to the longer term implications of that. I also escaped neurosurgery which seemed likely for a while – more good news.

I’m at home and on anti-clotting medication, aspirin and a restricted lifestyle. No sport, no running, no lifting, shorter working hours and so on. I’m back to Sydney in November for MRI and CT scans (on my birthday no less!) to see how things are healing/progressing and to visit the endovascular specialist. So there will be a lot more sewing until then!

I refuse to be miserable and angry about the way things have turned out. Sometimes ‘life’ happens and you’ve just got to make the best of things, accept limitations and find positives in the tough times.

I couldn’t be more grateful for my friends, family and workmates who have supported me through this very rough patch. I truly understand the meaning of ‘blessed’.

Thank you. xox

Banjo - same as always

Banjo – same as always


Finding my mojo in boho: Vogue 9253

$
0
0

Aka – The ‘it’ dress

Yes, the dress that seems to be ‘everywhere’, Vogue 9253. I make no apologies for succumbing to the pattern ‘fad’, I loved it on its release and purchased it as soon as it was in-store in Australia… which seems to take much less time than it used to.

I got home from hospital and decided I needed something lovely in my life to focus on… so sewing it was. There is no time for self misery when you surround yourself with beautiful things and people. I pulled this fabric put of my stash and immediately pictured this dress.

Vogue 9253

Vogue 9253 – much more ladylike but alas a droopy hat.

I’ve struggled in 2017 with trying to sew sensible things, things for my lifestyle and whatnot… but in all honesty I enjoy sewing when inspiration takes me by surprise. Right now, I have the urge to sew all.the.pretty.dresses so I think I might just indulge myself. Welcome back mojo.

Modifications

I sewed up the front bodice pieces in the centre by 2 inches (10 centimetres) and turned narrow hems under along the raw edges. And then sewn these down to the bodice. The stitching lines continue down the skirt front and its front split opening.

Vogue 5253 - inner brodice finish. I sewed the front seam up 10cm.

Vogue 5253 – inner bodice finish. I sewed the front seam up 10cm.

I also only partially sewed the centre seam of the front skirt pieces. I find it easier to walk in maxi skirts that have a split, preferably in the front. This enables my legs to break free of the fabric, rather than the fabric wrapping around and slipping between my legs when I’m walking or there is a breeze to contend with. I finished the seams in the same manner as the bodice centre front seam.

I decided to not put in pockets as I felt the light fabric didn’t really suit pockets and they might interfere with the fluid drape of the skirt.

Vogue 9253

Vogue 9253

I french seamed the skirt side seams and narrow hemmed the skirt centre back seam edges for a neat finish.

I added strips of interfacing along the centre back seams to stabilise the fabric for the invisible zipper.

I shortened the skirt pieces by 3 inches. I’m 5 foot 4.

This fabric actually has a massive fabric repeat which I didn’t notice when I purchased it. It appealed to me due to the carefree large-scale print which seemed to have no rhyme or reason to it. I deliberately chose not to pattern match (shock, horror) as I prefer the carefree feel the fabric print, deliberately placing motifs just felt too structured for the relaxed feel I envisaged this dress/fabric match delivering.

Vogue 9253, back view

Vogue 9253, back view

Dislikes

The tie droops at the front. I think I may hand stitch this to the bodice seam, at least in part.

Verdict

Even with my minor grumble, I have lots of love for this dress and pattern. I do think sewing up the front bodice a little makes it much more wearable for day-to-day use.

I sewed this very slowly. I’m learning to ‘slow down’. I was still very tired from my week in hospital so I sat at my kitchen table as I created this, hand basted my pleats and darts, hand basted hems in place before machining. Yes, probably more fastidious than required… but it is a nicely finished dress and I love it.

I’m tempted to sew all.the.caftans… and I do hear Charlie calling my name… can I resist? Do I really need another pattern?

Pattern: Vogue 9253, size XS
Fabric: Rayon from East Coast Fabrics, Brisbane. Purchased in 2016.
Also see: there are sooooo many out there… just google Vogue 9253 or look up the #V9253 hashtag on instagram – enjoy! There was also a recent competition run by McCalls Patterns for this pattern. See all the winning entries here.


Why I sew…

When I saw the #sewphotohop challenge today I felt inspired to write up this blog post.

This dress better than most answers that question… it’s the place where the worries of life slip away… a place of promise and potential… where problems can be solved and beautiful things await.

It’s the place I lose myself. It’s the place where I also find myself again.

Vogue 9253

Vogue 9253


Wrapped in stars – Vogue 9251, a wrap dress

$
0
0
Vogue 9251 - woven wrap dress in viscose crepe

Vogue 9251 – woven wrap dress in viscose crepe

Another blast from the post-injury ‘go slow’ phase. This is Vogue 9251, view A.

They say not to wear wrap dresses on windy days but I did. These were taken in my lunchbreak (my workplace is about 200m away from this spot) and it was ridicolously windy. So the dress in turn clings and blows out in these photos – sorry but at least they are ‘real life’ photos!

Vogue 9251 - taken on a windy day!

Vogue 9251 – taken on a windy day!

I’ve made this as a work dress but I do really love the style and considering a floral maxi as a casual dress.

I love wrap dresses in summer. Easy care and easy to wear.

Modifications

I made view A with the flutter sleeves and shortened it by 2 inches.

I used purchased bias tape on the neckline, to hem the sleeves and skirt. Depending on the fabric weight, I sometimes find this makes for a much neater and flatter finish.

I used my Prym Turning Set to turn the ties… these make turning your narrow fabric tubes SO much easier!

Dislikes

I love the sleeves but do dislike how you can see the wrong side of the fabric and the sleeve hems, likewise with the skirt… but the dress is lovely and I can live with that. My fault for not choosing a fabric with a less obvious right/wrong side.

In these photos there is a wrinkle at the shoulder – which is not there when I’m looking in the mirror… the risks of walking and moving your arms I guess!

Vogue 9251 - side view

Vogue 9251 – side view

Verdict

I think I need another of these… lovely pattern.

It is slightly big, despite making the smallest size available, I wish I could pull it in that little bit more. I might try raising the neckline a tiny bit.

The skirt is a generous wrap and reasonably ‘breeze friendly’.

Vogue 9251 - a generous wrap for windy days

Vogue 9251 – a generous wrap for windy days

Pattern: Vogue 9251, size 8
Fabric: woven Italian viscose crepe ‘Star Gazer’ from Ruche Fabric. Seriously lovely stuff, doesn’t crease badly and is lovely to wear. Purchased on holiday in January.
Also See: Emily Hallman Designs, Brittany J Jones, Sewing Pomona, Sewing Pattern Review

Me
I’m doing OK. Not much to say about anything as my lifestyle is fairly restricted – hopefully things change after my November review. I’m deliberately being conservative as I figure it’s more likely to heal with less drama. I’ve had enough of medical drama for this lifetime.
I miss running. However I volunteer every week at Parkrun and am treasurer of a local running club so I’m staying in the mix and praying for a return to the pavement sometime soon.

Advertisements

Viewing all 176 articles
Browse latest View live